Welcome to Jaya International Co., Ltd one-stop shopping solutions for large solid wood machinery
How to use a table saw : making your first cuts
Quick guide
1. Correctly install the saw blade.
2. Stay safe with safety glasses and hearing protection.
3. Choose miter gauge or rip fence according to your cutting method.
4. Proper Feeding Procedure.
This table saw guide should get you started regardless of your skill level, please continue reading.
What is a table saw
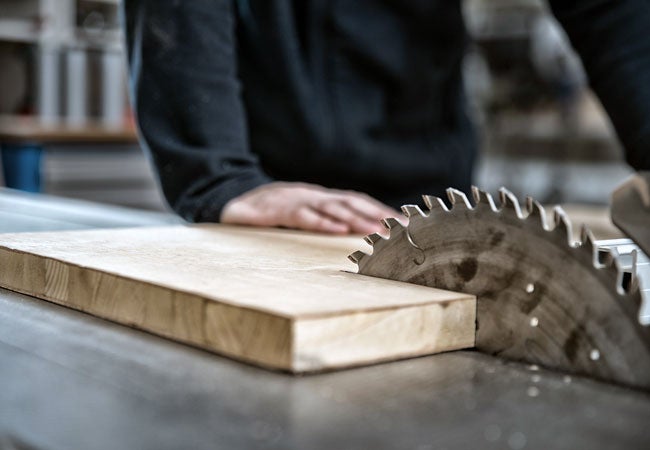
Named for the table that supports the material being cut, the table saw is a very simple yet efficient tool that you can think of as a more powerful upside-down circular saw mounted on a table. Instead of moving the saw to cut, it moves the wood, which allows for greater control over precision and efficiency.

Certainly most any cut that a table saw makes can be made with other tools such as a circular saw or a bandsaw. but a table saw makes them faster easier and with far more precision accuracy and repeatability. So, the table saw is an excellent tool for making quick, precise work of repetitive cutting tasks.
Really about the only kind of cut you can't make on a table saw is a curved cut.
Required Tools for this Project
Have the necessary tools for this DIY project lined up before you start - you’ll save time and frustration:
Dust mask
Hearing protection
Safety glasses
Digital bevel finder
Engineer's square
And, of course, a table saw
as a side note there are people who have made their own table saws by mounting a circular saw under a table, but unless you're an experienced woodworker don’t try this there are just too many safety considerations and making it accurate is pretty tedious. it would be a terribly frustrating a potentially dangerous way to begin your woodworking hobby.

Safety First
First and foremost, table saws are pieces of dangerous power equipment. They can and will seriously injure you if you get careless. Always wear safety glasses, hearing protection and dust mask, pay attention to what you are doing, and never lose respect for this powerful machine. It can hurt your fingers or your eyes if you're not careful or mishandled. Moderate tension and conscious thought at work can avoid this error.
Table saw accidents are fairly common. Around 4000 people suffer traumatic amputations every year in the United States. Also note that this is only amputations, so many more less serious injuries are not represented here.

Table saws are very dangerous to unskilled or careless operators. It is very easy to hurt yourself with one, whether by contacting the blade or losing control of the workpiece and suffering a kickback.
Of course, I'm not telling you this to scare you from using it. It's usually not new users learning how to use table saws that are injured, but those who have used them for years. We can get so complacent that we forget about safety rules. There is a Chinese proverb: "good driver dies from driving, good swimmer dies from drowning". Always be careful, follow the rules below and you will be safe.
1. Don't let the wood touch the blade until the blade is spinning at full speed - If the material makes contact with the blade before the blade reaches cutting speed, it a sure recipe for kickback.
2. Never stand in the direct path of the blade. Stand to the the left of the blade when making cuts, to lower your risk of being struck if there were kickback.
3. Don't cut warped boards. Warped or bent boards will make rough cuts and will cause wood to kick back. Do not use any boards that have been warped - Keep material completely flat against the table during the cut.
4. Familiarize yourself with the emergency shutdown button. Most table saws will have a large button for emergency shutdown. In the event of an accident or if the board bounces, you may need to shut down the machine quickly. Many times this button needs to be tapped with your knee, get used to it.
5. At all times, keep your hands at least six inches from the front and sides of the blade - use a push rod if necessary, especially if you're making narrow rips that would put your fingers within a few inches of the blade. Don't take any chances - always use the putter.
If you're ready for use this holy grail of woodworking, the following article will walk you through crosscuts and rip cuts with a table saw. Let's start!
How to use a table saw:a step-by-step guide
1. Set up the saw blades
There's a lot of different types of saw blades but I pretty much use a 50 tooth combination blade for everything. The blade can be raised and lowered with a crank at the front of the saw allowing you to cut wood of different thicknesses. Table saws also have a mechanism for tilting the blade so you can make miter cuts.

The tooth side should face you when installing the blade, don't over tighten the nut, just get it snug, the blade will spin towards you. And make sure your blade is locked exactly at 90 degrees to the table, this is where you will most often set it up, you can check this with an engineer's square.
Gauges that read bevel degrees can sometimes be inaccurate, therefore I recommend using a digital bevel finder for making accurate bevel cuts.

Your saw will come with a riving knife, the riving knife is the most important safety feature on your saw, it prevents kickback, never cut all the way through lumber without it in place. your saw will come with a blade guard maybe similar to this one, as a new woodworker use it. it's there to prevent wood from dropping on the blade or your hand from skimming across it.

2. Try to start it (for the first time)
Plug your saw into an outlet, put on a pair of safety glasses, hearing protection and dust mask, make sure there's nothing on the table of obstructing the blade, and flip the switch on. Get a feel for how the machine reacts when powered on and the noise it makes, the noise from a saw could be a little jarring the first time you hear, it even with hearing protection in place. Go ahead and turn it on and off a few times, especially get used to turning it off. A lot of table saws require you to stop it with your knees, so you have to be able to do it with skill. You should feel the power of the table saw even without cutting anything. Don't fear that power, but always respect it.
3. Technique of crosscuts
On the table there will be a groove on each side of the blade called a miter slot it's used for a miter gauge. Miter gauge is used to support the wood when making cross cuts usually against the grain of the wood, like the name implies you can rotate it for making angled or mitered cuts.
let's start with a crosscut, for this remove the RIP fence and set it aside, install your miter gauge in the left miter slot(Don't install miter gauge and RIP fence at the same time). Raise the blade so it's a little higher than the thickness of the wood. There's been some debate about this, some people think raising the blade as high as possible will result in a better cut, but I've had perfect cuts with the blade lower. And obviously, the less blades are exposed, the safer the cut will be. I usually keep my blade about 1/4 of an inch higher than the material that i am cutting.
Make a mark where you want to cut and make sure to line up the teeth of the blade with the outside of the marked point, or your board will be about an eighth of an inch short, which is important.
Now's when I want you to imagine your cut, I do this for every procedure no matter how simple, make it a habit, imagine the cut you're about to make. How are you gonna turn on the saw, how will you hold the wood against the miter gauge, where we position your body throughout the cut, what will you do after the board is cut. And most of all imagine where your hands will be throughout the entire procedure from the moment you turned on the saw to the moment you turn it off. Establishing this habit will become even more important as you learn to make more complicated cuts. Turn on your dust extractor(if you have one), and power up the saw with the board in place and firmly held against the biter gauge position your body to the left of the blade, never make a cross cut in line with the blade. If a cut off piece were to kick back at you, you don't want to be in its path, again with your riving knife in place kickback will be far less likely to occur. For the first cut, slowly push the miter gauge forward and through the blade, you may be surprised how easy it cuts. Once the cut is complete, pull the board apart with your left hand and pull the miter gauge back to the front of the table saw. Resist the temptation to reach over the blade to retrieve the cutoff piece, just let it sit there until the saw has stopped.

4. Technique of rip cuts
In this operation we will use the RIP fence, this will have a clamping mechanism that lets you position it as close to the blade as needed. And it's used for making rip cuts those are cuts that go along the length of a board in the same direction as the grain.
When using the RIP fence your workpiece will almost always be against the fence, and the cut off part will be on the other side of the blade, this will give you complete control of the piece you're working on throughout the entire cut. Making cuts with the RIP fence will require to use either a push stick or a push block, but whatever you choose, don't just go through the process with your hands.
Same as when crosscuts, as always do an imaginary dry run envisioning where your hands will be throughout the entire cut and how you'll position your push sticks or push block. Turn on the saw and set the board against the rip fence, for the first part of the cut you'll probably need to use your hands to guide the wood into the blade. especially on longer boards, push forward with your right hand and use your left hand to press the board toward the fence. When the end of the board is getting closer to the blade, you need to use the push sticks. The most important technique for using the push sticks is to always have pressure on your wood at three points: forward, downward, and inward on the edge of the wood to keep it against the rip fence when ripping a board.

If the material is long and extends beyond the back of the table, either use a table extension to support it or have a helper support it as you cut to keep the material flat at all times. Don’t let go of the material and walk around to the back of the table saw, which may cause the material to lift off the table, increasing the risk of kickback.
FAQ:
1. Can I use my miter saw as a table saw?
A miter saw is similar in conception to a table saw in that it utilizes a rotating circular saw blade to cut wood. However, a miter saw is meant for a very specific purpose, while a table saw is a general-purpose wood cutting tool. Miter saws are specifically designed to make accurate crosscuts and angular cuts.
2. Why does my table saw blade wobble?
The most common cause of wobble like this is that the bearings or bushings are worn out. These are the things that hold the main shaft in place. They should be a close fit to the shaft, and the shaft rotates within them. When they are worn out, there is too much room and the shaft flops around or wobbles.
3. Why is table saw burning wood?
The type of wood and the friction between the blade and the wood are the two main causes of the table saw leaving burn marks. Cherry and walnut are highly sensitive woods. Possible causes include a dull or dirty blade, an incorrectly aligned or wrong blade, or pushing the stock too slowly.
Related recommendations
Best quality, best service
Please give us a message
The More You Know Us, The More You Trust Us!
We trust that our experience and intimate knowledge of this line will entitle us to your confidence.
Email: sales@jayacn.com
Add: NO.216 Zhongkai Road, Qinshui Industrial Park, Muping District, Yantai City, Shandong China

